Use payment modal
MONEI Payment Modal is the simplest way to securely collect payments from your customers without them leaving your website.
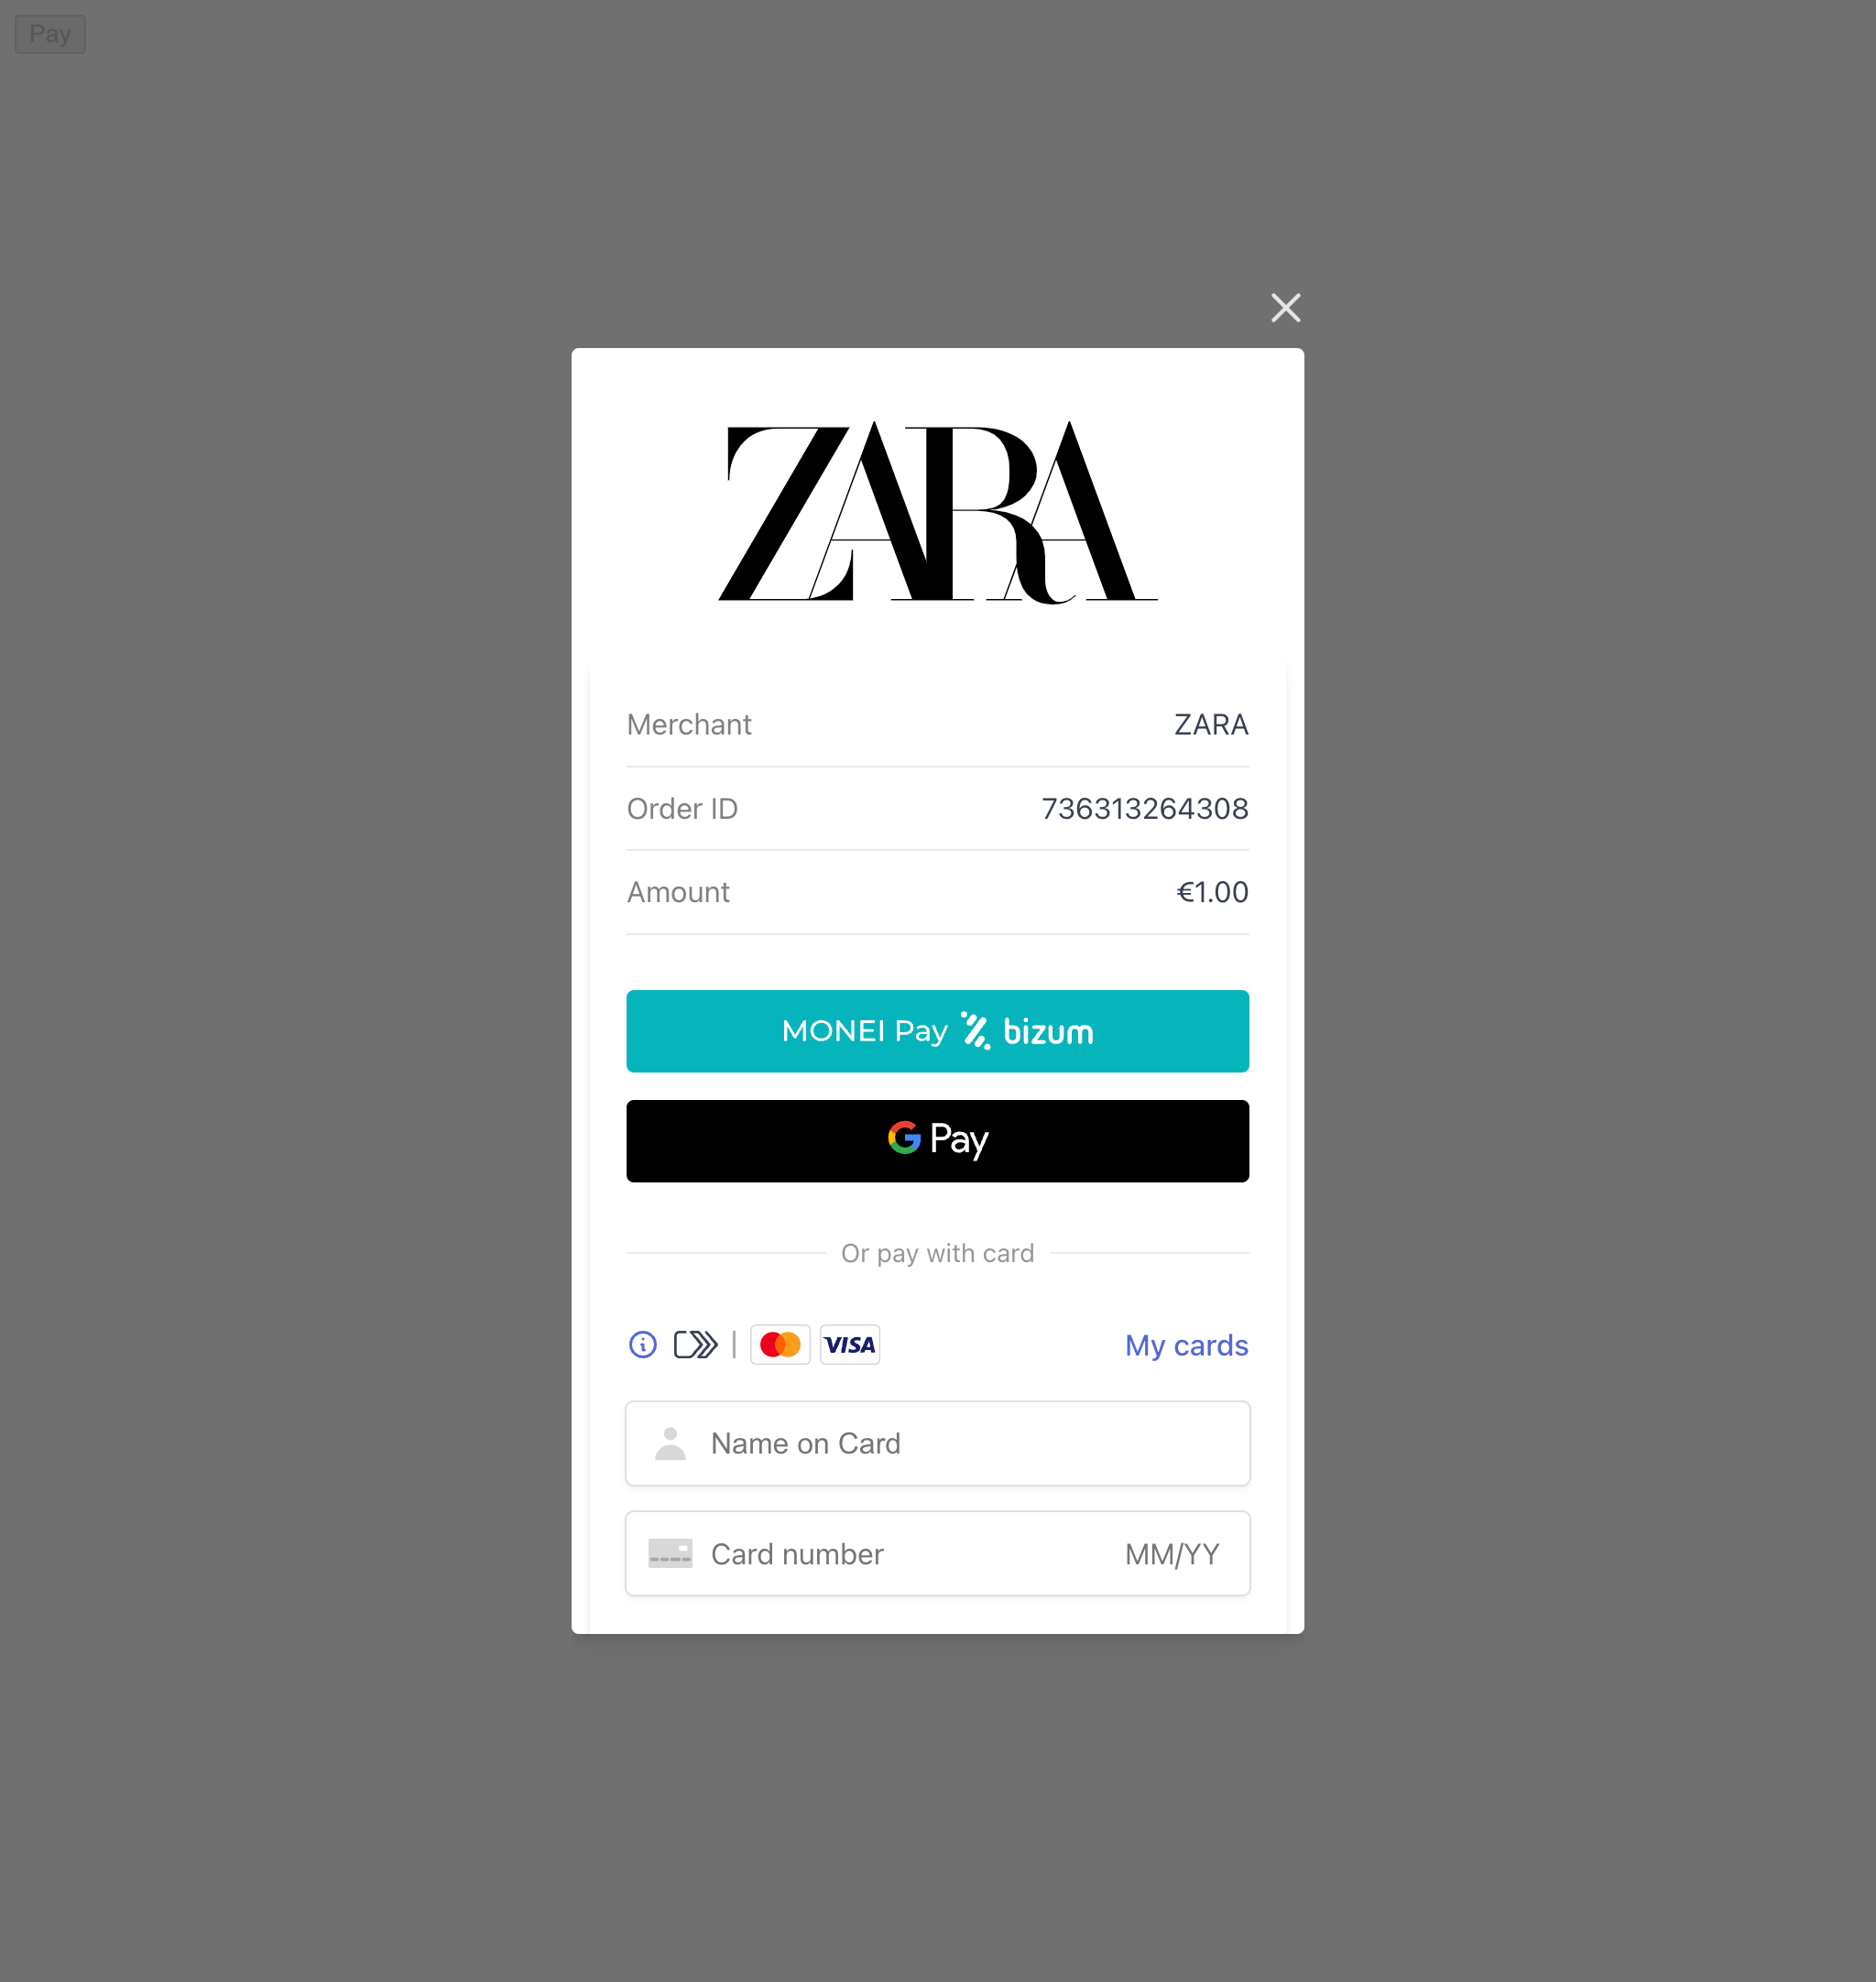
Collecting payments on your website consists of creating a payment object, and confirming the payment.
Apple Pay is not available when using MONEI Payment Modal integration.
Before You Begin
- You'll need a MONEI account and your API keys (test or live). Find them in your MONEI Dashboard.
- Use your test mode keys for integration testing.
- Ensure relevant payment methods are enabled in your account settings.
- You can monitor test payments in your MONEI Dashboard → Payments (ensure Test Mode is active).
Integration Steps
Integrating the Payment Modal involves creating a payment on your server, using monei.js to handle the modal on the client-side, and processing the final payment status via webhooks.
1. Create Payment (Server-side)
Create a Payment on your server with an amount and currency. Always decide how much to charge on the server side, a trusted environment, as opposed to the client. This prevents malicious customers from being able to choose their own prices.
- cURL
- Node.js
- PHP
- Python
curl --request POST 'https://api.monei.com/v1/payments' \
--header 'Authorization: YOUR_API_KEY' \
--header 'Content-Type: application/json' \
--data-raw '{
  "amount": 110,
  "currency": "EUR",
  "orderId": "14379133960355",
  "description": "Test Shop - #14379133960355",
  "customer": {
    "email": "email@example.com"
   },
  "callbackUrl": "https://example.com/checkout/callback"
}'
(Replace YOUR_API_KEY with your actual MONEI API key)
import {Monei} from '@monei-js/node-sdk';

// Replace YOUR_API_KEY with your actual MONEI API key
const monei = new Monei('YOUR_API_KEY');

const payment = await monei.payments.create({
  amount: 110,
  currency: 'EUR',
  orderId: '14379133960355',
  description: 'Test Shop - #14379133960355',
  customer: {
    email: 'email@example.com'
  },
  callbackUrl: 'https://example.com/checkout/callback'
});

// You will need the paymentId from the response in the next step
const paymentId = payment.id;
<?php
require_once 'vendor/autoload.php';

use Monei\Model\CreatePaymentRequest;
use Monei\Model\PaymentCustomer;
use Monei\MoneiClient;

// Replace YOUR_API_KEY with your actual MONEI API key
$monei = new MoneiClient('YOUR_API_KEY');

$payment = $monei->payments->create(
  new CreatePaymentRequest([
    'amount' => 110,
    'currency' => 'EUR',
    'order_id' => '14379133960355',
    'description' => 'Test Shop - #14379133960355',
    'customer' => new PaymentCustomer([
      'email' => 'email@example.com'
    ]),
    'callback_url' => 'https://example.com/checkout/callback'
  ])
);

// You will need the paymentId from the response in the next step
$paymentId = $payment->getId();
?>
import Monei
from Monei import CreatePaymentRequest, PaymentCustomer

# Replace YOUR_API_KEY with your actual MONEI API key
monei = Monei.MoneiClient(api_key="YOUR_API_KEY")

payment = monei.payments.create(
    CreatePaymentRequest(
        amount=110,
        currency="EUR",
        order_id="14379133960355",
        description="Test Shop - #14379133960355",
        customer=PaymentCustomer(
          email="email@example.com"
        ),
        callback_url="https://example.com/checkout/callback"
    )
)

# You will need the paymentId from the response in the next step
payment_id = payment.id
Key Parameters:
- amount
positive integer: Amount in the smallest currency unit (e.g., 110 for €1.10). - currency
string: Three-letter ISO currency code (e.g.,EUR). - orderId
string: Your unique order identifier. - callbackUrl
string: Your server endpoint URL for asynchronous webhook notifications.
Check all available request parameters.
Included in the returned Payment object is a payment id. You will use this paymentId on the client-side in the next step.
2. Handle Payment Interaction (Client-side)
Use monei.js to confirm the payment. This will trigger the payment modal pop-up.
Include monei.js on your checkout page:
<head>
  <title>Checkout</title>
  <script src="https://js.monei.com/v2/monei.js"></script>
</head>
<body>
  <form id="payment-form">
    <button id="payment-button" type="submit">Pay</button>
  </form>
  <script>
    // Initialize client-side script here (see below)
  </script>
</body>
Use the paymentId obtained in Step 1 to call monei.confirmPayment. You can also provide additional parameters like customer.email. Check all available parameters.
// Get the paymentId passed from your server
const paymentId = '{{payment_id}}'; // Replace with the actual paymentId

const paymentForm = document.getElementById('payment-form');
const paymentButton = document.getElementById('payment-button');

paymentForm.addEventListener('submit', function (event) {
  event.preventDefault();
  paymentButton.disabled = true;

  monei
    .confirmPayment({paymentId: paymentId}) // Pass the paymentId here
    .then(function (result) {
      paymentButton.disabled = false;
      // This result reflects the immediate outcome of the modal interaction (e.g., user closed, initial success).
      // Always rely on the webhook (Step 3) for the definitive final payment status.
      console.log('Payment confirmation result:', result);
      if (result.status === 'SUCCEEDED' || result.status === 'PENDING') {
        // Optionally, inform the user that payment is processing.
        handleResult(result);
      } else {
        // Handle errors like user cancellation or immediate failures.
        handleError(result);
      }
    })
    .catch(function (error) {
      paymentButton.disabled = false;
      console.error('Error confirming payment:', error);
      // Handle network errors or other issues.
    });
});

function handleResult(result) {
  // Redirect to a success/pending page or update UI.
  // Remember: Final confirmation comes via webhook.
  console.log('Handling result:', result);
  alert('Payment status: ' + result.status + '. Waiting for final confirmation.');
}

function handleError(result) {
  // Show error message to the user.
  console.error('Handling error:', result);
  alert('Payment failed or was cancelled. Status: ' + result.status);
}
After the form is submitted, MONEI automatically shows a pop-up window with a payment page to collect payment details and handle any necessary 3D Secure confirmation.
If you prefer redirecting the customer instead of using an on-site modal, see the Prebuilt Payment Page guide.
3. Process Webhook Notification (Server-side)
MONEI sends the final, authoritative payment status via an asynchronous HTTP POST request to the callbackUrl you provided in Step 1. The request body contains the full Payment object in JSON format.
This webhook ensures you get the definitive status even if the customer closes their browser prematurely.
Crucially, you must:
- Verify the
MONEI-Signatureheader included in the request. This confirms the webhook genuinely came from MONEI. See the Verify Signatures guide for implementation details. - Return a
200 OKHTTP status code immediately upon receiving the webhook to acknowledge receipt. Any other status code (including3xxredirects) tells MONEI the notification failed.
If MONEI doesn't receive a 200 OK, it will retry sending the webhook multiple times over several days before marking it as failed.
{
  "id": "af6029f80f5fc73a8ad2753eea0b1be0",
  "amount": 110,
  "currency": "EUR",
  "orderId": "14379133960355",
  "status": "SUCCEEDED", // Or FAILED, CANCELED, EXPIRED etc.
  "customer": { ... },
  // ... other payment details ...
  "createdAt": 1594215339,
  "updatedAt": 1594215345
}
Once the signature is verified, inspect the status field in the Payment object to determine whether to fulfill the order or handle a failure.