Bizum
Accept Bizum payments to provide your customers with a secure and convenient way to make instant payments from their smartphones, desktops, or tablets. Bizum, a trusted Spanish mobile payment solution, ensures seamless transactions across multiple devices.
Easily start accepting Bizum payments on your website or mobile app with the Hosted Payment Page or Bizum Component. No extra configuration is needed to enable Bizum on the Hosted Payment Page.
The Bizum Component adds a dedicated Bizum button to your payment page. When customers select Bizum, an overlay appears, allowing them to enter their registered phone number to complete the payment quickly and securely.
Online Bizum transactions do not have a maximum amount limit. However, if a transaction fails, it may be due to the issuing bank imposing its own limit or insufficient funds in the consumer's account. Unlike the peer-to-peer (P2P) limits imposed by Bizum, there is no monthly cap on the number of online purchases a customer can make using the service.
With Bizum, you can perform pre-authentications (transactionType: AUTH) and capture payments at a later time. During pre-authentication, the Bizum number is verified to confirm it belongs to the account holder via an online API, without holding or authorizing any funds as done in card pre-authorizations. Once the account holder is authenticated successfully, you have up to 30 days to capture the payment for the specified amount. Both full and partial captures are supported — when capturing, you can specify an amount less than or equal to the original pre-authenticated amount. If insufficient funds are available in the linked IBAN at the time of capture, the transaction will not proceed. No additional Strong Customer Authentication (SCA) or challenge is required from the Bizum holder during the capture. Note that Bizum payment pre-authentications are available only if the customer's bank supports the RTP (Request to Pay) flow.
Bizum transactions can be refunded within 365 days after the initial transaction has been processed. However, in some cases, the refund may fail due to one of the following reasons:
- The customer has disconnected their Bizum account.
- The customer has changed the link between their phone number and IBAN.
- The issuing bank is experiencing internal issues with Bizum notifications.
The status of a payment is a critical aspect of a transaction, as any discrepancy between the payment gateway and the processor can have serious consequences for both the merchant and the consumer. An error in this area can result in failed transactions, financial losses, or trust issues between the involved parties. For this reason, MONEI has developed an exclusive internal technology that ensures the security of the status of each transaction made through the Bizum payment method at all times. This advanced technology allows MONEI to monitor and verify each transaction with precision, ensuring that payments are processed efficiently and without errors, thus providing greater peace of mind for both merchants and consumers.This functionality is exclusively available worldwide through the MONEI Bizum API, with no other tech companies having access to it.
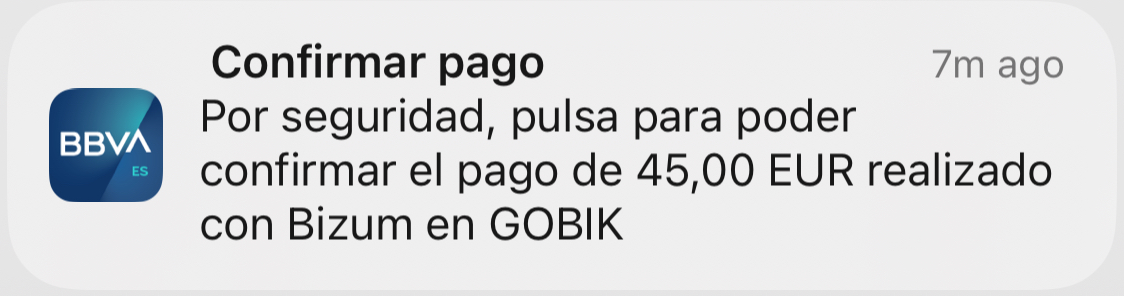
You can send a payment request directly to the customer’s phone. If the Bizum payment method is available and the phone number is registered with Bizum, the customer will receive a push notification to confirm the payment directly in their banking app. If not, they’ll receive a payment link via WhatsApp. This feature works independently of the UI Component.
Example of a Bizum push notification:
Subscriptions with Bizum
You can use Bizum to offer subscriptions or recurring payments in a similar way to card-based subscriptions. When creating a subscription or recurring payment through the MONEI API, simply set Bizum as the payment method instead of a card. The overall process is almost identical, with a few specific considerations:
-
Currently, issuing banks are deploying the solution with the goal of reaching over 90% of coverage in terms of users by November 2025. If the customer's bank does not support Bizum subscriptions, the subscription will not work. Please make sure to confirm this directly with your customer, as MONEI does not have access to issuing bank information.
-
The customer will only be asked to authorize the first payment. All subsequent payments will be processed automatically if you use the MONEI subscriptions engine, or you can manage them manually using MONEI’s recurring payments API.
-
Keep in mind that only one recurring payment per month can be made through Bizum, and the subscription amount cannot be changed after the first payment. The initial amount remains fixed for all future billing cycles.
Before you begin
This page explains how to add Bizum to your payment page. To accept Bizum payments please contact our Support Team to configure Bizum.
Before you start, you need to make sure that you have Bizum enabled in MONEI Dashboard → Settings → Payment Methods.
To test your integration:
- Use your test mode Account ID and API Key.
- Use the test phone numbers.
- You can check the status of a test payment in your MONEI Dashboard → Payments (in test mode).
Integration
1. Create a Payment Server-side
Create a Payment on your server with an amount and currency. Always decide how much to charge on the server side, a trusted environment, as opposed to the client. This prevents malicious customers from being able to choose their own prices.
- cURL
- Node.js
- PHP
curl --request POST 'https://api.monei.com/v1/payments' \
--header 'Authorization: pk_test_3c140607778e1217f56ccb8b50540e00' \
--header 'Content-Type: application/json' \
--data-raw '{
  "amount": 110,
  "currency": "EUR",
  "orderId": "14379133960355",
  "description": "Test Shop - #14379133960355",
  "customer": {
    "email": "email@example.com"
   },
  "callbackUrl": "https://example.com/checkout/callback"
}'
const {Monei} = require('@monei-js/node-sdk');
const monei = new Monei('pk_test_36cf3e8a15eff3f5be983562ea6b13ec');
monei.payments.create({
  amount: 110,
  currency: 'EUR',
  orderId: '14379133960355',
  description: 'Test Shop - #14379133960355',
  customer: {
    email: 'email@example.com'
  },
  callbackUrl: 'https://example.com/checkout/callback'
});
$monei = new Monei\MoneiClient('pk_test_36cf3e8a15eff3f5be983562ea6b13ec');
$monei->payments->create([
  'amount' => 110,
  'currency' => 'EUR',
  'orderId' => '14379133960355',
  'description' => 'Test Shop - #14379133960355',
  'customer' => [
    'email' => 'email@example.com'
  ],
  'callbackUrl' => 'https://example.com/checkout/callback'
]);
The following parameters are required:
- amount
positive integer- Amount intended to be collected by this payment. A positive integer representing how much to charge in the smallest currency unit (e.g., 100 cents to charge 1.00 USD) - currency
string- Three-letter ISO currency code, in uppercase. Must be a supported currency. - orderId
string- An order ID from your system. A unique identifier that can be used to reconcile the payment with your internal system. - callbackUrl
string- The URL to which a payment result should be sent asynchronously.
Check all available request parameters.
Included in the returned Payment object is a payment id, which is used on the client side to securely complete the payment process instead of passing the entire Payment object.
2. Add Bizum to your payment page Client-side
Include monei.js on your checkout page by adding the script tag to the head of your HTML file.
<head>
  <title>Checkout</title>
  <script src="https://js.monei.com/v2/monei.js"></script>
</head>
Add MONEI Bizun Component to your payment page. Create empty DOM node (container) with unique ID in your payment form.
<form
  action="https://secure.monei.com/payments/{{payment_id}}/confirm"
  method="post"
  id="payment-form"
>
  <div id="bizum_container">
    <!-- A MONEI Bizum Component will be inserted here. -->
  </div>
</form>
Initialize Bizum Component
// Create an instance of the Bizum component.
const bizum = monei.Bizum({
  paymentId: '{{payment_id}}',
  onSubmit(result) {
    moneiTokenHandler(result.token);
  },
  onError(error) {
    console.log(error);
  }
});

// Render an instance of the Bizum component into the `bizum_container` <div>.
bizum.render('#bizum_container');
Bizum Component is also available as a React and Vue component. Check out our examples.
Check the MONEI JS Reference for more options.
3. Confirm the payment Client-side
To complete the payment you need to confirm it using monei.js confirmPayment function
You need to provide a paymentId (obtained in step 1) and paymentToken generated with PayPal Component. You can also provide additional parameters like customer.email. Check all available parameters.
// Confirm the payment
function moneiTokenHandler(token) {
  return monei
    .confirmPayment({paymentId: '{{payment_id}}', paymentToken: token})
    .then(function (result) {
      // At this moment you can show a customer the payment result
      // But you should always rely on the result passed to the callback endpoint on your server
      // to update the order status
      console.log(result);
    })
    .catch(function (error) {
      console.log(error);
    });
}
As an alternative process you can submit generated paymentToken to your sever and then confirm payment on the server-side.
4. An asynchronous request is sent to your server.
MONEI will notify you about the payment status by sending an HTTP POST request to the callbackUrl. The request body will contain full payment object in JSON format.
This ensures that you get the payment status even when customer closed the browser window or lost internet connection.
The request also contains a MONEI-Signature header. Verify this signature to confirm that received request is sent from MONEI.
To acknowledge receipt of the request, your endpoint must return a 200 HTTP status code to MONEI. All other response codes, including 3xx codes, indicate to MONEI that you did not receive the event.
If MONEI does not receive a 200 HTTP status code, the notification attempt is repeated. After multiple failures to send the notification over multiple days, MONEI marks the request as failed and stops trying to send it to your endpoint.
Before you go live
- Make sure that you are using live (production) mode Account ID and API Key.
- Make sure that you have connected your Bizum business account in MONEI Dashboard.